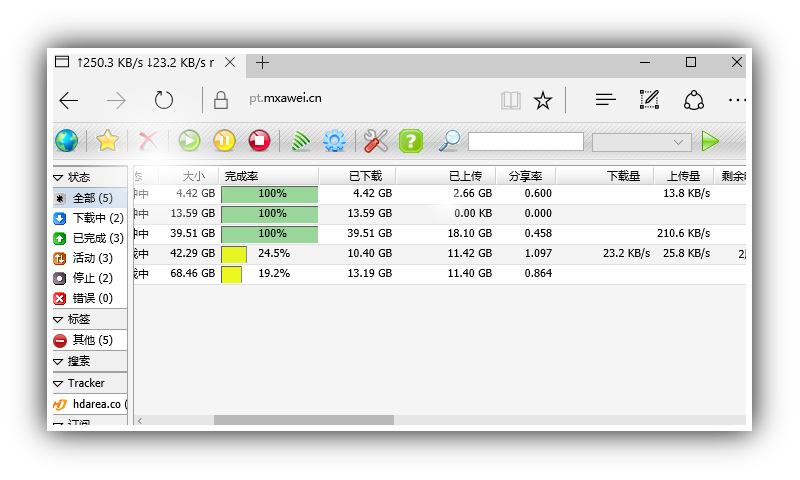
不用手动编译了,安装EPEL(企业版 Linux 附加软件包)源,就OK了。
sudo yum -y install epel-release
sudo yum -y install rtorrent
之前做了个MLDonkey离线下载平台,结果不支持PT,现在感觉PT占主流,于是上网搜索,用ruTorrent+rTorrent搭建个PT离线下载平台。
安装依赖
yum update
yum -y groupinstall "Development tools" "Server Platform Development" && yum -y install cppunit-devel libsigc++20-devel.x86_64 libcurl-devel xmlrpc-c-devel.x86_64 openssl-devel ncurses-devel
安装内核
- 环境设置
   echo "/usr/local/lib/" >> /etc/ld.so.conf
   ldconfig
   export PKG_CONFIG_PATH=/usr/local/lib/pkgconfig
- 安装libTorrent
下载地址:https://github.com/rakshasa/libtorrent/
也可以git下载、更新代码
下载
git clone https://github.com/rakshasa/libtorrent.git
进入目录更新
git pull https://github.com/rakshasa/libtorrent.git
执行安装
./autogen.sh
./configure
make
make install
- 安装rTorrent
下载地址:https://github.com/rakshasa/rtorrent
同上,也可以用git下载、更新代码 下载
git clone https://github.com/rakshasa/rtorrent.git
进入目录更新
git pull https://github.com/rakshasa/rtorrent.git
执行安装
./autogen.sh
./configure --with-xmlrpc-c
make
make install
ldconfig
配置文件~/.rtorrent.rc
# This is an example resource file for rTorrent. Copy to
# ~/.rtorrent.rc and enable/modify the options as needed. Remember to
# uncomment the options you wish to enable.

# Maximum and minimum number of peers to connect to per torrent.
#min_peers = 40
max_peers = 100

# Same as above but for seeding completed torrents (-1 = same as downloading)
#min_peers_seed = 10
#max_peers_seed = 50

#Maximum number of simultanious uploads per torrent.
max_uploads = 15

# Global upload and download rate in KiB. "0" for unlimited.
download_rate = 0
upload_rate = 0

# Default directory to save the downloaded torrents.
directory = /home/data/samba/awei/Movie/2D

# Default session directory. Make sure you don't run multiple instance
# of rtorrent using the same session directory. Perhaps using a
# relative path?
session = ~/.session

# Watch a directory for new torrents, and stop those that have been
# deleted.
#schedule = untied_directory,5,5,stop_untied=

# Close torrents when diskspace is low.
schedule = low_diskspace,5,60,close_low_diskspace=1024M

# The ip address reported to the tracker.
#ip = 127.0.0.1
#ip = rakshasa.no

# The ip address the listening socket and outgoing connections is
# bound to.
#bind = 127.0.0.1
#bind = rakshasa.no

# Port range to use for listening.
port_range = 49164-49164

# Start opening ports at a random position within the port range.
#port_random = no

# Check hash for finished torrents. Might be usefull until the bug is
# fixed that causes lack of diskspace not to be properly reported.
check_hash = no

# Set whether the client should try to connect to UDP trackers.
#use_udp_trackers = yes

# Alternative calls to bind and ip that should handle dynamic ip's.
#schedule = ip_tick,0,1800,ip=rakshasa
#schedule = bind_tick,0,1800,bind=rakshasa

# Encryption options, set to none (default) or any combination of the following:
# allow_incoming, try_outgoing, require, require_RC4, enable_retry, prefer_plaintext
#
# The example value allows incoming encrypted connections, starts unencrypted
# outgoing connections but retries with encryption if they fail, preferring
# plaintext to RC4 encryption after the encrypted handshake
#
# encryption = allow_incoming,enable_retry,prefer_plaintext

# Enable DHT support for trackerless torrents or when all trackers are down.
# May be set to "disable" (completely disable DHT), "off" (do not start DHT),
# "auto" (start and stop DHT as needed), or "on" (start DHT immediately).
# The default is "off". For DHT to work, a session directory must be defined.
#
dht = off

# UDP port to use for DHT.
#
# dht_port = 6881

# Enable peer exchange (for torrents not marked private)
#
# peer_exchange = yes
scgi_port = 127.0.0.1:5000
encoding_list = UTF-8
schedule = watch_directory,5,5,load.start=/home/data/samba/awei/Movie/watch/*.torrent
普通运行方法
screen rtorrent
当前窗口Ctrl a+d后台运行
screen -r恢复运行窗口
systemctl运行方式
创建service文件:
vim /etc/systemd/system/rtorrent.service"
内容如下:
[Unit]
Description=rTorrent
After=network.target auditd.service

[Service]
Type=forking
ExecStart=/usr/bin/screen -d -m -fa -S rtorrent /usr/bin/rtorrent
ExecStop=/bin/bash -c '/bin/kill -15 "$$(cat %h/.rtorrent.pid)"'
ExecStop=/bin/bash -c 'while /bin/kill -0 "$$(cat %h/.rtorrent.pid)"; do /bin/sleep 0.1; done'
ExecStopPost=bin/rm %h/.rtorrent.pid

Restart=on-failure
User=username
WorkingDirectory=~

[Install]
WantedBy=multi-user.target
service方式
下载脚本,到/etc/init.d目录下,修改/etc/rc.local
wget https://github.com/asuna/personal-scripts/raw/master/init.d/rtorrent /etc/init.d/
chmod 755 /etc/init.d/rtorrent
echo '/usr/sbin/service rtorrent start' >> /etc/rc.local
可以把rtorrent脚本里的root替换成相应的普通用户,这样,rotorrent就能开机启动了。
安装ruTorrent
- 下载
下载地址:https://github.com/Novik/ruTorrent
或用git下载
git clone https://github.com/Novik/ruTorrent.git
进入目录更新
git pull https://github.com/Novik/ruTorrent.git
- 设置apache,配置VirtualHost
    <VirtualHost *:443>
    ServerAdmin awei@mxawei.cn
    ServerName pt.mxawei.cn
    DocumentRoot /home/data/www/html/pt
    SSLEngine on
    SSLProtocol all -SSLv2
    SSLCipherSuite ALL:!ADH:!EXPORT:!SSLv2:RC4+RSA:+HIGH:+MEDIUM

    SSLCertificateFile /etc/pki/tls/certs/2_mxawei.cn.crt
    SSLCertificateKeyFile /etc/pki/tls/private/3_mxawei.cn.key
    SSLCertificateChainFile /etc/pki/tls/certs/1_root_bundle.crt
    <Directory “/home/data/www/html/pt/”>
    AuthName pt
    AuthType Basic
    AuthUserFile /etc/httpd/vhost-conf.d/.htpassword
    Require valid-user
    Options FollowSymLinks
    AllowOverride All
    #Require all granted
    </Directory>
    ErrorLog /var/log/httpd/pt.mxawei.cn/logs/error.log
    CustomLog /var/log/httpd/pt.mxawei.cn/logs/access.log combined
    </VirtualHost>
创建访问的用户与密码
htpasswd -c -m /etc/httpd/vhost-conf.d/.htpassword user passwd

